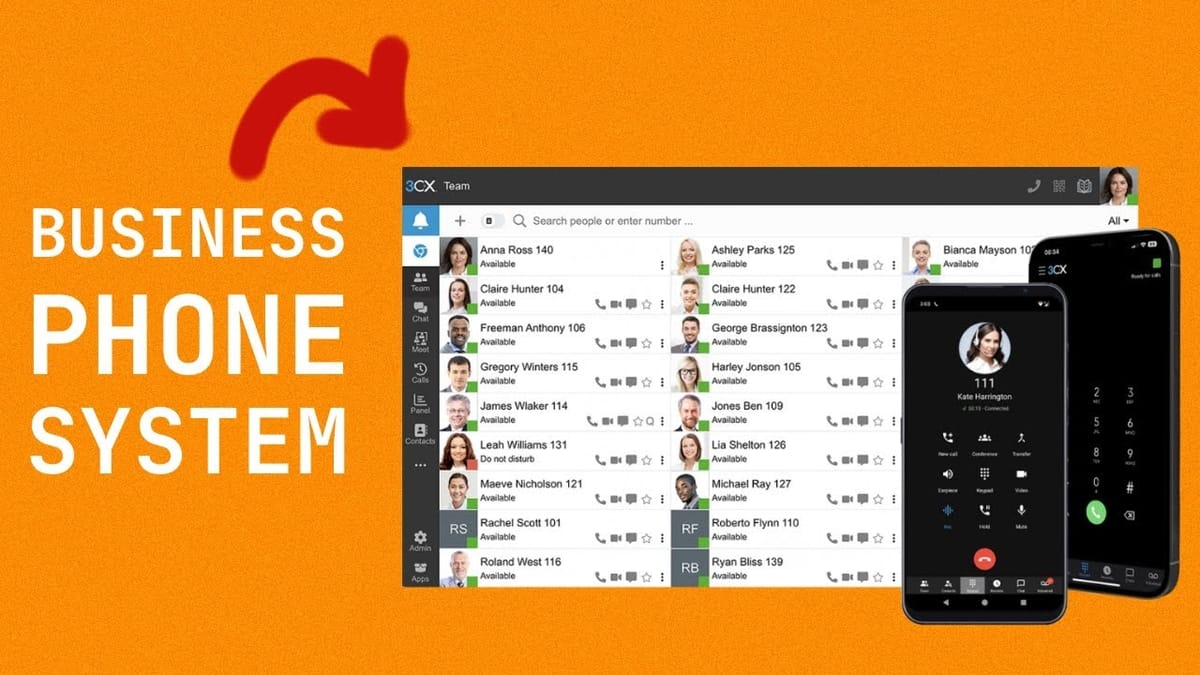
Business Phone Setup Made Easy | 3CX Hosted PBX
Modernize your business phone system with 3CX's cloud-based PBX. Easy setup, advanced features, and seamless integration for professional communications.
Introduction [00:00]
Setting up a professional phone system for your business can seem daunting, but with modern cloud-based solutions, it’s become more accessible and affordable than ever. This guide will walk you through the process of setting up a hosted PBX (Private Branch Exchange) system using 3CX, a powerful and flexible solution that’s trusted by major corporations like Coca-Cola, Toyota, and Holiday Inn. We’ll cover everything from creating your account to configuring advanced features like ring groups and virtual receptionists. By the end of this guide, you’ll have a fully functional business phone system that can handle video conferencing, business text messaging, and even live chat for your website – all manageable from any device without complicated hardware or hefty monthly user fees.
Get 3CXCreate an Account with 3CX [00:44]
Setting up your 3CX hosted PBX system is the first step towards modernizing your business communications. This section will guide you through the process of creating your account and configuring the initial settings.
Signing Up for a Free Trial
3CX offers a generous two-month free trial, allowing you to explore all the features before committing to a plan. Here’s how to get started:
- Visit the 3CX website using the provided link in the video description
- Scroll to the bottom of the page and look for “Try 3CX hosted on a free two month trial”
- Click on the “Get Started” button to begin the sign-up process
- Enter your name and email address, then click “Let’s Go” to create your user account
Choosing Your Plan and Domain
Once your user account is set up, you’ll need to select a plan and configure your domain:
- Select the “3CX hosted” option under the Pro/Enterprise tier
- Choose a domain name for your PBX (e.g., “profitabletools”)
- Select the server location nearest to you for optimal performance
Configuring Basic Settings
After selecting your plan and domain, you’ll need to configure some basic settings:
- Set your extension format (3-digit extensions are recommended for most businesses)
- Choose your time zone
- Select the standard English prompt set (or your preferred language)
Automatic Setup Process
3CX will then automatically set up your system, which includes:
- Configuring your chosen domain name
- Securing the system with an SSL certificate
- Installing and configuring the necessary software
- Setting up firewall rules for security
This process typically takes about 5 minutes, after which you’ll receive your login credentials and the URL to access your 3CX system.
Installing the 3CX App
To maximize the functionality of your new phone system:
- Download the 3CX app for iOS or Android
- This app will allow you to make and receive calls, participate in video conferences, and manage your communications on the go
By following these steps, you’ll have laid the foundation for your new business phone system. The next sections will guide you through adding users and configuring more advanced features to tailor the system to your specific needs.
Add Users [02:46]
Adding users to your 3CX system is a crucial step in setting up your business phone network. This process allows you to assign extensions to each team member and manage their permissions within the system. Let’s dive into the details of how to add users and configure their settings.
Accessing User Management
To begin adding users to your 3CX system:
- Log into your 3CX admin dashboard
- Click on the gear icon in the lower left-hand corner
- Select “Users” from the menu
Adding Individual Users
Follow these steps to add each user to your system:
- Click the “Add User” button
- Enter the user’s full name
- Assign an extension number (e.g., 101, 102, etc.)
- Provide the user’s email address
- Set a password for their account
Configuring User Roles and Permissions
3CX offers different user roles to help manage access and permissions:
- User: Standard role for most employees
- Receptionist: Additional features for managing incoming calls
- System Administrator: Full access to configure and manage the system
To set a user’s role:
- Select the appropriate role from the dropdown menu in the user’s profile
- Click “Save” to apply the changes
Bulk User Import
For larger organizations, 3CX offers a bulk import feature:
- Prepare a CSV file with user details (name, extension, email, etc.)
- In the Users section, look for an “Import Users” option
- Upload your CSV file and follow the prompts to add multiple users at once
Customizing User Settings
After adding users, you can customize their individual settings:
- Click on a user’s name to access their profile
- Configure forwarding rules for unanswered calls
- Set up voicemail preferences
- Assign users to specific ring groups or departments
User Training and Onboarding
To ensure smooth adoption of the new phone system:
- Provide each user with their login credentials
- Guide them through the process of installing the 3CX app on their devices
- Offer a brief training session on basic features like making calls and accessing voicemail
Monitoring and Adjusting
After adding users:
- Regularly review the user list to ensure it’s up to date
- Make adjustments to permissions or settings as needed
- Remove or deactivate users who have left the organization
By carefully adding and configuring users in your 3CX system, you’ll create a tailored communication network that meets the specific needs of your business and team members. This foundation will allow you to take full advantage of 3CX’s advanced features and streamline your organization’s communication processes.
Making an Internal Call [03:55]
One of the primary benefits of setting up a PBX system like 3CX is the ability to make internal calls between team members quickly and easily. This feature not only streamlines communication within your organization but also helps reduce costs associated with external calls. Let’s explore how to make internal calls using your new 3CX system and the various features available.
Using the 3CX Desktop App
The 3CX desktop application provides a user-friendly interface for making internal calls:
- Open the 3CX desktop app on your computer
- Click on the phone icon or the dialpad button
- Enter the extension number of the colleague you want to call (e.g., 101)
- Alternatively, start typing the name of your colleague to search for their extension
- Choose between a voice call or a video call
- Click the call button to initiate the conversation
Making Calls from the Web Client
If you prefer not to install the desktop app, you can use the 3CX web client:
- Log into your 3CX account through a web browser
- Navigate to the dialpad or contacts section
- Enter the extension or name of the person you want to call
- Select the type of call (voice or video) and initiate the call
Using the Mobile App for Internal Calls
The 3CX mobile app allows you to make internal calls from anywhere:
- Open the 3CX app on your smartphone
- Navigate to the dialpad or contacts tab
- Enter the extension or search for the contact
- Tap the call button to start the conversation
Advanced Internal Calling Features
3CX offers several advanced features for internal calls:
- Presence indicators: See if colleagues are available, on a call, or away
- Instant messaging: Send quick text messages alongside voice communications
- Call transfer: Easily transfer calls between team members
- Conference calls: Set up multi-party internal conference calls
Best Practices for Internal Calls
To make the most of your internal calling system:
- Encourage team members to keep their presence status up to date
- Use video calls for more personal and engaging conversations when appropriate
- Utilize the chat feature for quick questions or to share links and files
- Take advantage of call recording for training or record-keeping purposes
Troubleshooting Internal Calls
If you experience issues with internal calls:
- Check your internet connection, as 3CX relies on a stable network
- Ensure all users have the latest version of the 3CX app installed
- Verify that extensions are correctly configured in the admin dashboard
- Contact 3CX support if persistent issues occur
By mastering the art of internal calls with 3CX, your team can communicate more efficiently, leading to increased productivity and collaboration within your organization. The next sections will cover how to connect your system to the outside world, enabling external calls and expanding your communication capabilities.
What’s a SIP Trunk? [04:53]
A Session Initiation Protocol (SIP) trunk is a critical component that bridges your internal phone system with the outside world. Understanding SIP trunking is essential for leveraging the full potential of your 3CX hosted PBX system. Let’s delve into what SIP trunks are, how they work, and why they’re important for your business communications.
Definition of SIP Trunking
SIP trunking is a method of sending voice and other unified communications services over the internet. It’s essentially a virtual version of a traditional phone line:
- Replaces physical phone lines with a virtual connection via the internet
- Allows your PBX system to send and receive calls to and from regular phone numbers
- Enables integration of voice and data services on the same line
How SIP Trunks Work
SIP trunks operate by converting voice into data packets:
- Voice signals are digitized and transmitted over the internet
- Uses the SIP protocol to establish, maintain, and terminate voice calls
- Connects your IP-PBX (like 3CX) to the public switched telephone network (PSTN)
Benefits of SIP Trunking
Implementing SIP trunks with your 3CX system offers several advantages:
- Cost savings: Typically cheaper than traditional phone lines, especially for long-distance calls
- Scalability: Easily add or remove lines as your business grows
- Flexibility: Make and receive calls from anywhere with an internet connection
- Advanced features: Supports video calls, instant messaging, and presence information
Choosing a SIP Trunk Provider
When selecting a SIP trunk provider to work with 3CX:
- Check the 3CX website for a list of compatible providers in your country
- Consider factors like call quality, reliability, and customer support
- Compare pricing structures and ensure they align with your call volume and patterns
Setting Up SIP Trunks with 3CX
To connect your 3CX system to a SIP trunk:
- Choose a compatible SIP trunk provider
- Obtain the necessary credentials and server information from your provider
- Configure the SIP trunk settings in your 3CX admin dashboard
- Set up inbound and outbound call routing rules
Common SIP Trunking Issues and Solutions
Be aware of potential challenges when using SIP trunks:
- Audio quality issues: Often resolved by prioritizing VoIP traffic on your network
- Security concerns: Use encryption and firewalls to protect your communications
- Compatibility problems: Ensure your chosen provider is fully compatible with 3CX
By understanding SIP trunking and its role in your 3CX system, you’ll be better equipped to make informed decisions about your business communications infrastructure. The next section will explore pricing options for SIP trunking services, helping you budget for this essential component of your phone system.
Amazon Chime Pricing [05:28]
Amazon Chime, a communication service provided by Amazon Web Services (AWS), offers SIP trunking capabilities that can be integrated with your 3CX hosted PBX system. Understanding the pricing structure of Amazon Chime is crucial for budgeting and determining the cost-effectiveness of this solution for your business. Let’s break down the pricing details and what they mean for your organization.
Basic Pricing Structure
Amazon Chime’s SIP trunking service follows a pay-as-you-go model:
- Monthly fee per phone line: $1.00
- Inbound call charges: Approximately $0.002 per minute
- Outbound call charges: Vary based on the destination
Inbound Call Pricing
For calls received through your Amazon Chime SIP trunk:
- Cost per minute: $0.002 (as of the video recording date)
- Example calculation: A one-hour inbound call would cost approximately $0.13
Outbound Call Pricing
Charges for outbound calls depend on the destination:
- Domestic calls (within the United States): $0.0048 per minute
- Example calculation: A one-hour outbound domestic call would cost about $0.29
International Call Pricing
For calls to international destinations:
- Rates vary significantly depending on the country called
- Check Amazon Chime’s pricing page for specific international rates
Additional Costs to Consider
When budgeting for Amazon Chime with 3CX, keep in mind:
- Data transfer costs: Minimal for most use cases but may apply in some scenarios
- Phone number fees: May incur additional charges for reserving specific phone numbers
- Feature-specific charges: Some advanced features might have separate pricing
Cost Comparison
To understand the value of Amazon Chime pricing:
- Compare with traditional phone line costs
- Consider the included features and flexibility of the service
- Factor in potential savings from reduced hardware and maintenance costs
Tips for Optimizing Costs
To make the most of Amazon Chime’s pricing structure:
- Monitor your usage patterns to predict and control costs
- Use internal calls through 3CX when possible to avoid SIP trunk charges
- Consider purchasing reserved capacity if you have consistent, high-volume usage
Billing and Monitoring
Stay on top of your Amazon Chime expenses:
- Utilize AWS Cost Explorer to track and analyze your spending
- Set up billing alerts to notify you of unexpected usage spikes
- Regularly review your bill to identify any areas for optimization
By understanding Amazon Chime’s pricing structure, you can make informed decisions about your communication costs and ensure that your 3CX integration remains cost-effective. The next section will guide you through the process of connecting Amazon Chime to your 3CX system, allowing you to start making and receiving external calls.
Connecting Amazon Chime [06:25]
Integrating Amazon Chime with your 3CX hosted PBX system allows you to connect your internal phone network to the outside world. This process involves setting up a SIP trunk through Amazon Chime and configuring it within your 3CX dashboard. Let’s walk through the steps to establish this connection and get your system ready for external communications.
Setting Up Amazon Chime
Before connecting to 3CX, you need to set up Amazon Chime:
- Log into your AWS account and search for “Chime”
- Select “Amazon Chime SDK” from the services list
- Navigate to “Phone Number Management” in the sidebar
Provisioning a Phone Number
To obtain a phone number for your system:
- Go to the “Orders” tab and click “Provision Phone Numbers”
- Choose “Voice Connector” as the product type
- Select your country and whether you want a local or toll-free number
- Pick an available phone number from the list
Creating a Voice Connector
Set up a Voice Connector to manage your SIP trunk:
- Navigate to “Voice Connectors” in the sidebar
- Click “Create Voice Connector” and give it a name
- Set encryption to “Disabled” (as required by 3CX)
- Save the Voice Connector settings
Configuring Termination Settings
To enable outbound calls:
- In your Voice Connector, go to the “Termination” tab
- Enable termination
- Add your 3CX IP address to the “Allowed Host List”
- Set up your calling plan (e.g., select countries you can call)
- Create credentials (username and password) for authentication
Setting Up Origination
For inbound calls:
- Go to the “Origination” tab in your Voice Connector
- Enable origination
- Add a new inbound route with your 3CX hostname and port (usually 5060)
- Set the protocol to TCP
Assigning Phone Numbers
Link your provisioned phone number to the Voice Connector:
- Navigate to the “Phone Numbers” tab
- Click “Assign from Inventory” and select your number
- Assign it to your created Voice Connector
Configuring 3CX
Now, set up the trunk in your 3CX system:
- Log into your 3CX admin dashboard
- Go to “Voice and Chat” under settings
- Click “Add Trunk” and select “Custom” as the provider
Entering Trunk Details in 3CX
Fill in the trunk configuration form:
- Name your trunk (e.g., “Amazon Chime Voice Connector”)
- Set the call route (e.g., to your main user or a receptionist)
- Enter the Amazon Chime outbound hostname as the registrar/server
- Input your main trunk number (the one you provisioned)
- Enter the username and password you created in Amazon Chime
Testing the Connection
After saving your trunk configuration:
- Make a test call to your new number from an external phone
- Verify that it rings through to your 3CX system
- Try making an outbound call to ensure two-way communication is working
Troubleshooting Common Issues
If you encounter problems:
- Double-check all entered information for accuracy
- Ensure your 3CX system’s IP address is correctly added to Amazon Chime’s allowed list
- Verify that your firewall is not blocking the necessary ports
- Contact Amazon Chime or 3CX support if issues persist
By following these steps, you’ll successfully connect Amazon Chime to your 3CX system, enabling your business to make and receive external calls. This integration bridges the gap between your internal communications and the outside world, providing a comprehensive phone solution for your business. The next sections will cover testing your inbound calls and setting up the 3CX mobile app for on-the-go communication.
Testing Inbound Call [11:02]
After setting up your 3CX system and connecting it to Amazon Chime, it’s crucial to test your inbound call functionality. This ensures that external callers can reach your business and that calls are being routed correctly within your system. Let’s go through the process of testing inbound calls and what to look out for during this important step.
Preparing for the Test
Before making a test call:
- Ensure your 3CX system is fully configured and online
- Verify that your Amazon Chime SIP trunk is active and properly connected
- Have your new business phone number ready (the one provisioned through Amazon Chime)
Making the Test Call
To test your inbound call functionality:
- Use a phone that’s not connected to your 3CX system (e.g., a personal mobile phone or landline)
- Dial the phone number you provisioned through Amazon Chime
- Listen for the ring and wait for the call to be answered or routed according to your setup
Verifying Call Routing
As the call comes in, observe how it’s handled by your 3CX system:
- Check if the call rings on the intended device (e.g., your computer or 3CX app)
- If you’ve set up a digital receptionist, ensure the correct greeting plays
- Verify that any call routing rules you’ve established are working correctly
Testing Different Scenarios
To ensure comprehensive functionality:
- Try calling during and outside of business hours if you’ve set different rules
- Test call forwarding to mobile devices if you’ve configured this feature
- Have colleagues test incoming calls to their extensions
Checking Call Quality
While on the test call:
- Assess the audio quality for clarity and consistency
- Listen for any echoes, delays, or distortions
- Ensure two-way audio is functioning properly
Monitoring System Responses
During and after the test call:
- Check your 3CX dashboard for incoming call logs
- Verify that call details are being recorded correctly
- Ensure any configured notifications (e.g., missed call alerts) are working
Troubleshooting Common Issues
If you encounter problems during testing:
- Verify your internet connection is stable and has sufficient bandwidth
- Double-check your Amazon Chime and 3CX configurations for any mismatches
- Ensure your firewall isn’t blocking incoming SIP traffic
- Test with different devices to isolate any device-specific issues
Ongoing Testing and Monitoring
Remember that testing shouldn’t be a one-time event:
- Schedule regular test calls to ensure continued functionality
- Monitor call quality and system performance over time
- Stay alert for any changes in call patterns or quality that might indicate issues
By thoroughly testing your inbound call functionality, you can ensure that your 3CX system is ready to handle real-world business communications. This testing phase is crucial for identifying and resolving any issues before they impact your customers or operations. Once you’re confident in your inbound call handling, you can move on to exploring additional features like the 3CX mobile app, which we’ll cover in the next section.
3CX Mobile App [11:26]
The 3CX mobile app is a powerful tool that extends the functionality of your business phone system to your smartphone. This allows you to stay connected and manage your communications on the go, ensuring you never miss an important call or message. Let’s explore the features and setup process of the 3CX mobile app.
Downloading and Installing the App
To get started with the 3CX mobile app:
- Visit your device’s app store (Apple App Store for iOS or Google Play Store for Android)
- Search for “3CX” and download the official 3CX app
- Install the app on your smartphone or tablet
Setting Up the App
Once installed, you’ll need to connect the app to your 3CX account:
- Open the 3CX app on your mobile device
- Choose the option to scan a QR code for quick setup
- In your 3CX web interface, find the QR code for mobile app setup
- Use your phone’s camera to scan the QR code
- The app will automatically configure itself with your account details
Key Features of the 3CX Mobile App
The 3CX mobile app offers a range of features to enhance your mobile communication:
- Make and receive calls using your business phone number
- Access your company directory and contact list
- Send and receive text messages (both internal and external)
- Participate in video conferences and online meetings
- Check voicemail and manage messages
- View presence information of colleagues
- Transfer calls to other team members
Using the App for Calls
To make calls with the 3CX app:
- Open the app and navigate to the dialer or contacts section
- Enter a number or select a contact
- Choose between a voice or video call
- The call will be routed through your 3CX system, using your business number as the caller ID
Messaging and Chat Functions
The app also supports various messaging options:
- Send instant messages to colleagues within your 3CX system
- Use SMS/text messaging for external communications (if configured)
- Share files and images through the chat function
Managing Presence and Availability
Stay in control of your availability:
- Set your presence status (Available, Away, Do Not Disturb, etc.)
- Configure call forwarding rules directly from the app
- Set up out-of-office messages or custom statuses
Participating in Web Conferences
The 3CX app makes joining online meetings easy:
- Access scheduled meetings from within the app
- Join video conferences with a single tap
- Share your screen or present documents during meetings
Customizing App Settings
Tailor the app to your preferences:
- Adjust notification settings for calls, messages, and meetings
- Configure audio and video preferences
- Set up VoIP and cellular calling options
Security Considerations
Ensure the security of your business communications:
- Enable biometric or PIN authentication for app access
- Use the app over secure Wi-Fi or cellular connections
- Regularly update the app to receive the latest security patches
Troubleshooting Mobile App Issues
If you encounter problems with the 3CX mobile app:
- Ensure your phone has a stable internet connection
- Check that your 3CX account credentials are correct
- Clear the app cache or try reinstalling if issues persist
- Contact 3CX support for unresolved problems
By leveraging the 3CX mobile app, you can transform your smartphone into a powerful extension of your business phone system. This flexibility allows you to maintain professional communication standards whether you’re in the office, working remotely, or on the go. In the next section, we’ll explore how to set up advanced features like ring groups and virtual receptionists to further enhance your 3CX system’s capabilities.
Ring Groups & Virtual Receptionists [13:17]
Ring groups and virtual receptionists are advanced features of the 3CX system that can significantly improve your business’s call handling capabilities. These tools help distribute incoming calls efficiently and provide a professional first point of contact for your callers. Let’s explore how to set up and utilize these features to streamline your communication processes.
Understanding Ring Groups
Ring groups allow you to direct incoming calls to a specific group of extensions simultaneously or in a predefined order. This is particularly useful for departments like sales or support teams.
Setting Up a Ring Group
To create a ring group in 3CX:
- Log into your 3CX admin dashboard
- Navigate to “Call Handling” under the gear icon
- Select “Ring Groups” and click “Add New”
- Name your ring group (e.g., “Sales Team” or “Customer Support”)
- Add the extensions you want to include in the group
- Choose a ring strategy (e.g., “Ring All” or “Hunt”)
- Set the ring time and configure what happens if no one answers
Ring Strategies
Different ring strategies suit different team structures:
- Ring All: Rings all extensions in the group simultaneously
- Hunt: Calls extensions in a specific order
- Longest Idle: Rings the extension that has been idle the longest
- Random: Randomly selects an extension from the group
Implementing Virtual Receptionists
A virtual receptionist (also known as an auto-attendant) greets callers and provides menu options to route their calls appropriately.
Creating a Virtual Receptionist
To set up a virtual receptionist in 3CX:
- In the 3CX admin dashboard, go to “Call Handling”
- Select “Digital Receptionists” and click “Add New”
- Name your virtual receptionist (e.g., “Main Menu” or “After Hours”)
- Record or upload a greeting message
- Configure menu options and corresponding actions
Key Features of Virtual Receptionists
When setting up your virtual receptionist, consider including:
- A welcome message introducing your company
- Options to reach specific departments or individuals
- A directory lookup option for callers to find extensions
- Business hours information and after-hours handling
- Option to leave a voicemail or reach an operator
Integrating Ring Groups and Virtual Receptionists
Combine these features for optimal call handling:
- Use the virtual receptionist as the first point of contact
- Direct menu options to specific ring groups (e.g., “Press 1 for Sales”)
- Set up different virtual receptionists for business hours and after hours
Best Practices for Ring Groups
To make the most of your ring groups:
- Keep group sizes manageable (typically 5-10 extensions)
- Regularly review and update group members
- Monitor call statistics to ensure even distribution
- Consider using skills-based routing for specialized inquiries
Optimizing Virtual Receptionists
Enhance your virtual receptionist’s effectiveness:
- Keep menu options simple and limited (ideally 4-5 choices)
- Regularly update greetings and menu options to reflect current information
- Provide an option to repeat the menu or reach a live operator
- Use professional voice talent for recordings if possible
Testing and Refining
After setting up ring groups and virtual receptionists:
- Conduct thorough testing from both internal and external phones
- Gather feedback from team members and callers
- Analyze call logs and reports to identify areas for improvement
- Make adjustments based on real-world usage and feedback
Advanced Configurations
For more complex setups, consider:
- Time-based routing to different ring groups or receptionists
- Integration with CRM systems for personalized call handling
- Using IVR (Interactive Voice Response) for more advanced menu systems
- Implementing callback options during high-volume periods
By effectively implementing ring groups and virtual receptionists, you can ensure that calls are handled efficiently and professionally, improving both customer experience and internal productivity. These features, when properly configured, can make even small businesses appear larger and more established, while helping larger organizations manage high call volumes with ease.
Get 3CXKey Takeaways
Setting up a business phone system with 3CX’s hosted PBX solution offers a powerful, flexible, and cost-effective way to manage your organization’s communications. Here are the key points to remember from this comprehensive guide:
- Easy Setup and Management: 3CX provides a user-friendly interface for setting up your phone system. With a free two-month trial, you can explore all features before committing. The cloud-hosted solution eliminates the need for complex hardware management, making it accessible for businesses of all sizes.
- Scalability and Customization: Adding users to your 3CX system is straightforward, allowing you to scale your phone network as your business grows. You can easily assign extensions, manage permissions, and customize settings for each user, ensuring that your phone system adapts to your organizational structure.
- Internal Communication: 3CX enables seamless internal calling between team members using extensions. This feature, available through desktop and mobile apps, enhances team collaboration and reduces costs associated with external calls.
- SIP Trunking Integration: Understanding SIP trunking is crucial for connecting your internal system to the outside world. 3CX integrates well with various SIP trunk providers, with Amazon Chime being a cost-effective option for many businesses.
- Cost-Effective Pricing: Amazon Chime’s pricing structure for SIP trunking is transparent and affordable. With pay-as-you-go pricing for inbound and outbound calls, businesses can maintain control over their communication costs while benefiting from advanced features.
- Seamless External Connectivity: Connecting Amazon Chime to your 3CX system bridges your internal network with external phone lines. This integration process, while technical, is manageable with the step-by-step guidance provided.
- Mobile Accessibility: The 3CX mobile app extends your business phone system to smartphones and tablets. This ensures that team members can stay connected and manage communications on the go, maintaining professional standards even when working remotely.
- Advanced Call Handling: Features like ring groups and virtual receptionists significantly enhance your call management capabilities. Ring groups ensure efficient call distribution among team members, while virtual receptionists provide a professional first point of contact for callers and streamline call routing.
- Continuous Testing and Optimization: Regular testing of inbound and outbound calls is essential to maintain system quality. Ongoing monitoring and adjustments based on usage patterns and feedback ensure that your phone system continues to meet your business needs effectively.
- Enhanced Business Image: By leveraging features like virtual receptionists and professional greetings, even small businesses can project a more established and professional image to callers.
- Flexibility and Integration: 3CX offers the flexibility to integrate with other business systems, such as CRM software, and supports advanced features like video conferencing and business text messaging, creating a unified communications platform.
- Future-Proofing Your Communications: By adopting a cloud-based solution like 3CX, businesses position themselves to easily adapt to future communication technologies and changing work environments, including support for remote and hybrid work models.
In conclusion, setting up a 3CX hosted PBX system provides businesses with a robust, flexible, and cost-effective communication solution. From easy setup and management to advanced features like ring groups and virtual receptionists, 3CX offers the tools necessary to enhance both internal and external communications. By following the steps outlined in this guide and continually optimizing your system based on your specific needs, you can create a professional and efficient phone system that supports your business growth and adapts to the evolving landscape of business communications.


